How to Draw and Paint From Imagination
In our previous article, we talked about the rules of composition. Now, we’re going to talk about the best exercise for composition, as well as how to use it to make images from imagination. But first, let’s sum up the last article.
What is composition? In visual arts, composition is an arrangement of elements on the canvas, panel, or frame. And what makes a good composition? A good composition is when elements on a picture are placed in such a way that the most important element (focal point) demands the most attention and that the positioning of those elements looks pleasing to the eye.
Now, we’re gonna talk about the absolute best exercise for composition. But a heads up, this exercise is intended for painters, but you can try it even if you’re a photographer, and let me know in the comments if it translated at all to your craft.
All you’ll need is a piece of paper and a sharpie! Although, I’ll be demonstrating this using digital tools for drawing.

The best way to study composition
First, I have to give credit to the best Podcast for artists on the internet. It’s Proko’s Draftsmen podcast, where I first heard about this exercise. Here’s a link to the exact episode where they talk about it.
At the 26:30 mark, Marshall talks about this exercise, but I highly recommend listening to the entire episode.
I might have slightly modified it, but here are the 4 steps:
- Find a master’s piece of art you like
- Break it into just 2 values – lights and darks
- Add a third value
- Make artwork from imagination using the same composition
STEP 1: Find a piece of art you like
The best way to study anything is to find someone who does it great and analyze it. Master studies are a very common practice in art.
If you’re a beginner, chose your master carefully. Some painters worked with low contrast, using very subtle changes in value, and if you’re just starting out, it can be very difficult to learn from them. That’s why it could be better to start with masters like Goya, Winslow Homer, Frank Brangwyn, Sargent, and Rembrandt.
But these are just suggestions, if there’s a piece of art you’re really drawn to, pick that, and study it.
If you don’t have any ideas where to start, you can check my Pinterest board for inspiration, where I saved some beautiful paintings and I’ll continue to add to so.
STEP 2: Break composition into 2 values
Now that you’ve found an image that you like, and that you want to study, if you put it in grayscale, you’ll notice that it probably has tons of values: black, white, and everything in between.
The goal of this exercise is to simplify those into just 2 values, 1 for the darks, and one for the lights. You’ll see that it’s quite challenging to do this. How do you decide what belongs to darks and what belongs to lights?
As Marshall pointed out in the podcast, if you have a scene with a light moon and dark trees, you have to decide if the sky is going to be light or dark. If you make it light, you’ll lose the moon, if you make it dark, you won’t see the trees.
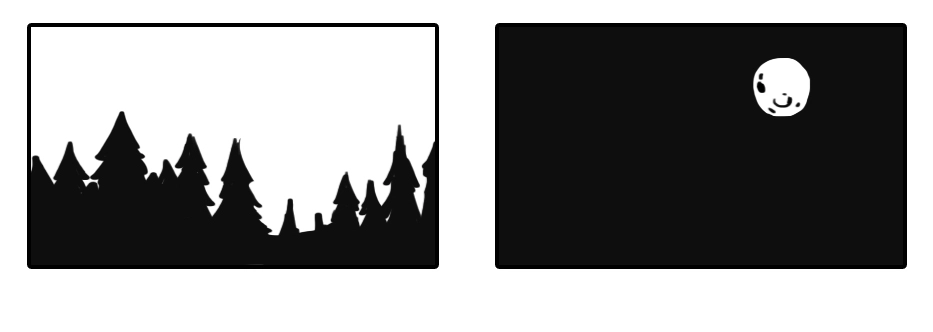
That’s the beauty of this exercise, it forces you to make sacrifices. It forces you to really think about the image, what is your goal, what is the story you want to tell, and what is important.
💡 A tip: try to follow the 70-30 rule. Make one of your values occupy 70% of the image and the other 30%. Of course, you don’t have to be precise with it, but I find it much more pleasing if one value takes more space than the other.
Why is it important to simplify the composition into 2 values? Because that’s the essence of an image. As Marshall said, that’s what even a colorblind dog sees. And if your drawing or a painting looks good as just blobs of black and white, it’s going to look good when you add other values, colors, and details.
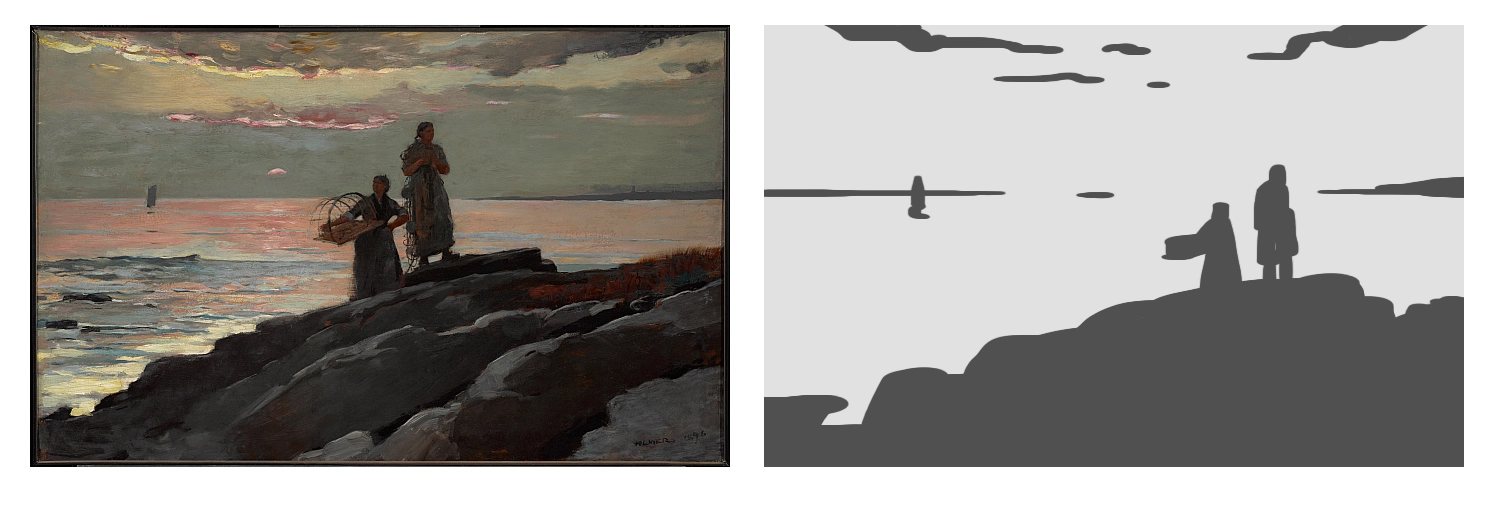
Here, as an example, I took a painting from Winslow Homer and distilled it into two values – light and dark.
STEP 3: Adding a third value
This is where the magic happens. In the last step, you had to make sacrifices and tough decisions. Now, you can add both the moon and the trees. Adding a third value allows you to have multiple focal points in the image and tell more complex stories.
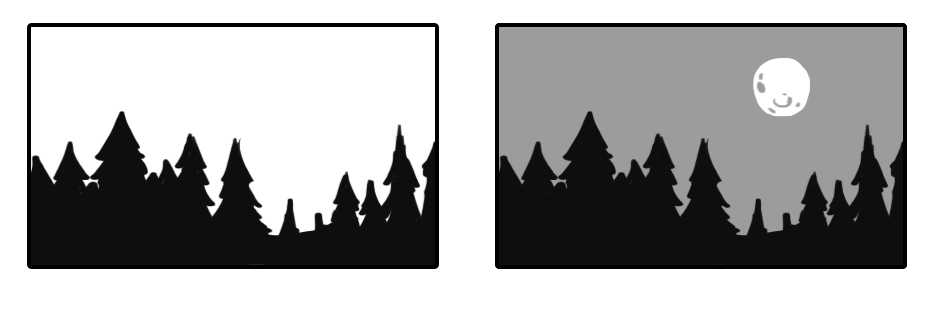
Important, don’t just add the third shade randomly over the image. Choose one of the 2 values from before, for example dark, and contain your third value within those dark shapes. So you’ll end up with one light, and two dark shades. You can also do it the other way around, have two lights, and one dark. If you followed the tip from above and made 70% of the image one value, and 30% the other, then add the third value inside the 70% one.
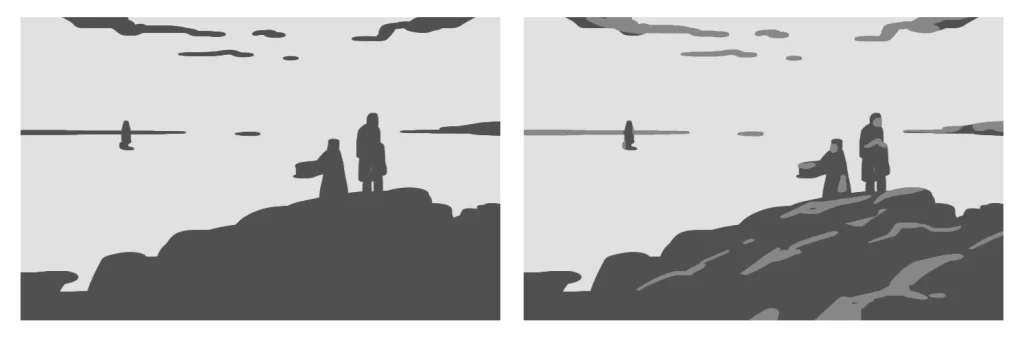
After this, you can start adding other values and making a more complete study. I’d recommend going for 5 values. Two in the darks, three in the lights.
STEP 4: Make your own artwork from imagination
So, up to this point, we’ve been analyzing other people’s work. Now it’s time to make something ourselves. But we’re not gonna make it from thin air. We’ll use the composition of the image we studied and “steal it”.
You probably heard a million times the saying that “artists steal”. Of course, it’s referring to taking inspiration from other artworks, combining them, and making something new and unique. Not actually stealing someone’s work and calling it your own. That’s wrong.
Now, we’re going to look at our study of our favorite artist, and take inspiration from it. Try to simplify the study even more. Take those 2 values, but make the shapes even more primitive. Turn the complex silhouettes into simple shapes, triangles, boxes, and circles. Or just blur the entire study, so you just see some dark and light splotches.
What do you see? Try to imagine something new in those shapes. The same way as when you look at the clouds and it reminds you of a dog or something. What do these shapes remind you of? You’ll probably see something new and unique. Something entirely different from the original piece you started with. Now draw or paint your own image using that same composition.

Then you can take your newly created image, and use it as an inspiration to create something even more different. Here, I cropped the image, changed the perspective a little bit, and ended up with something really cool (inspired by Assassin’s Creed ofc 😁).
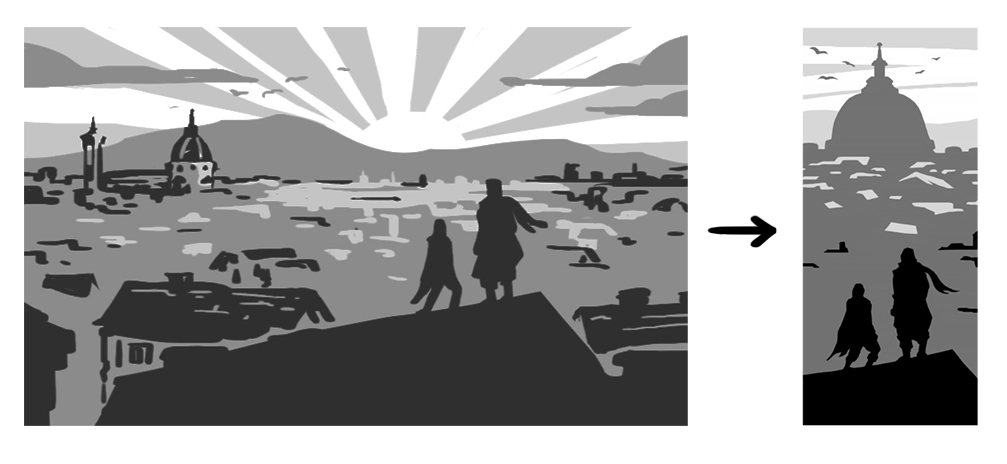
Examples of painting from imagination with this method
Here’s an astonishing example, Jama Jurabaev shows us how we can use the same composition on multiple pieces.
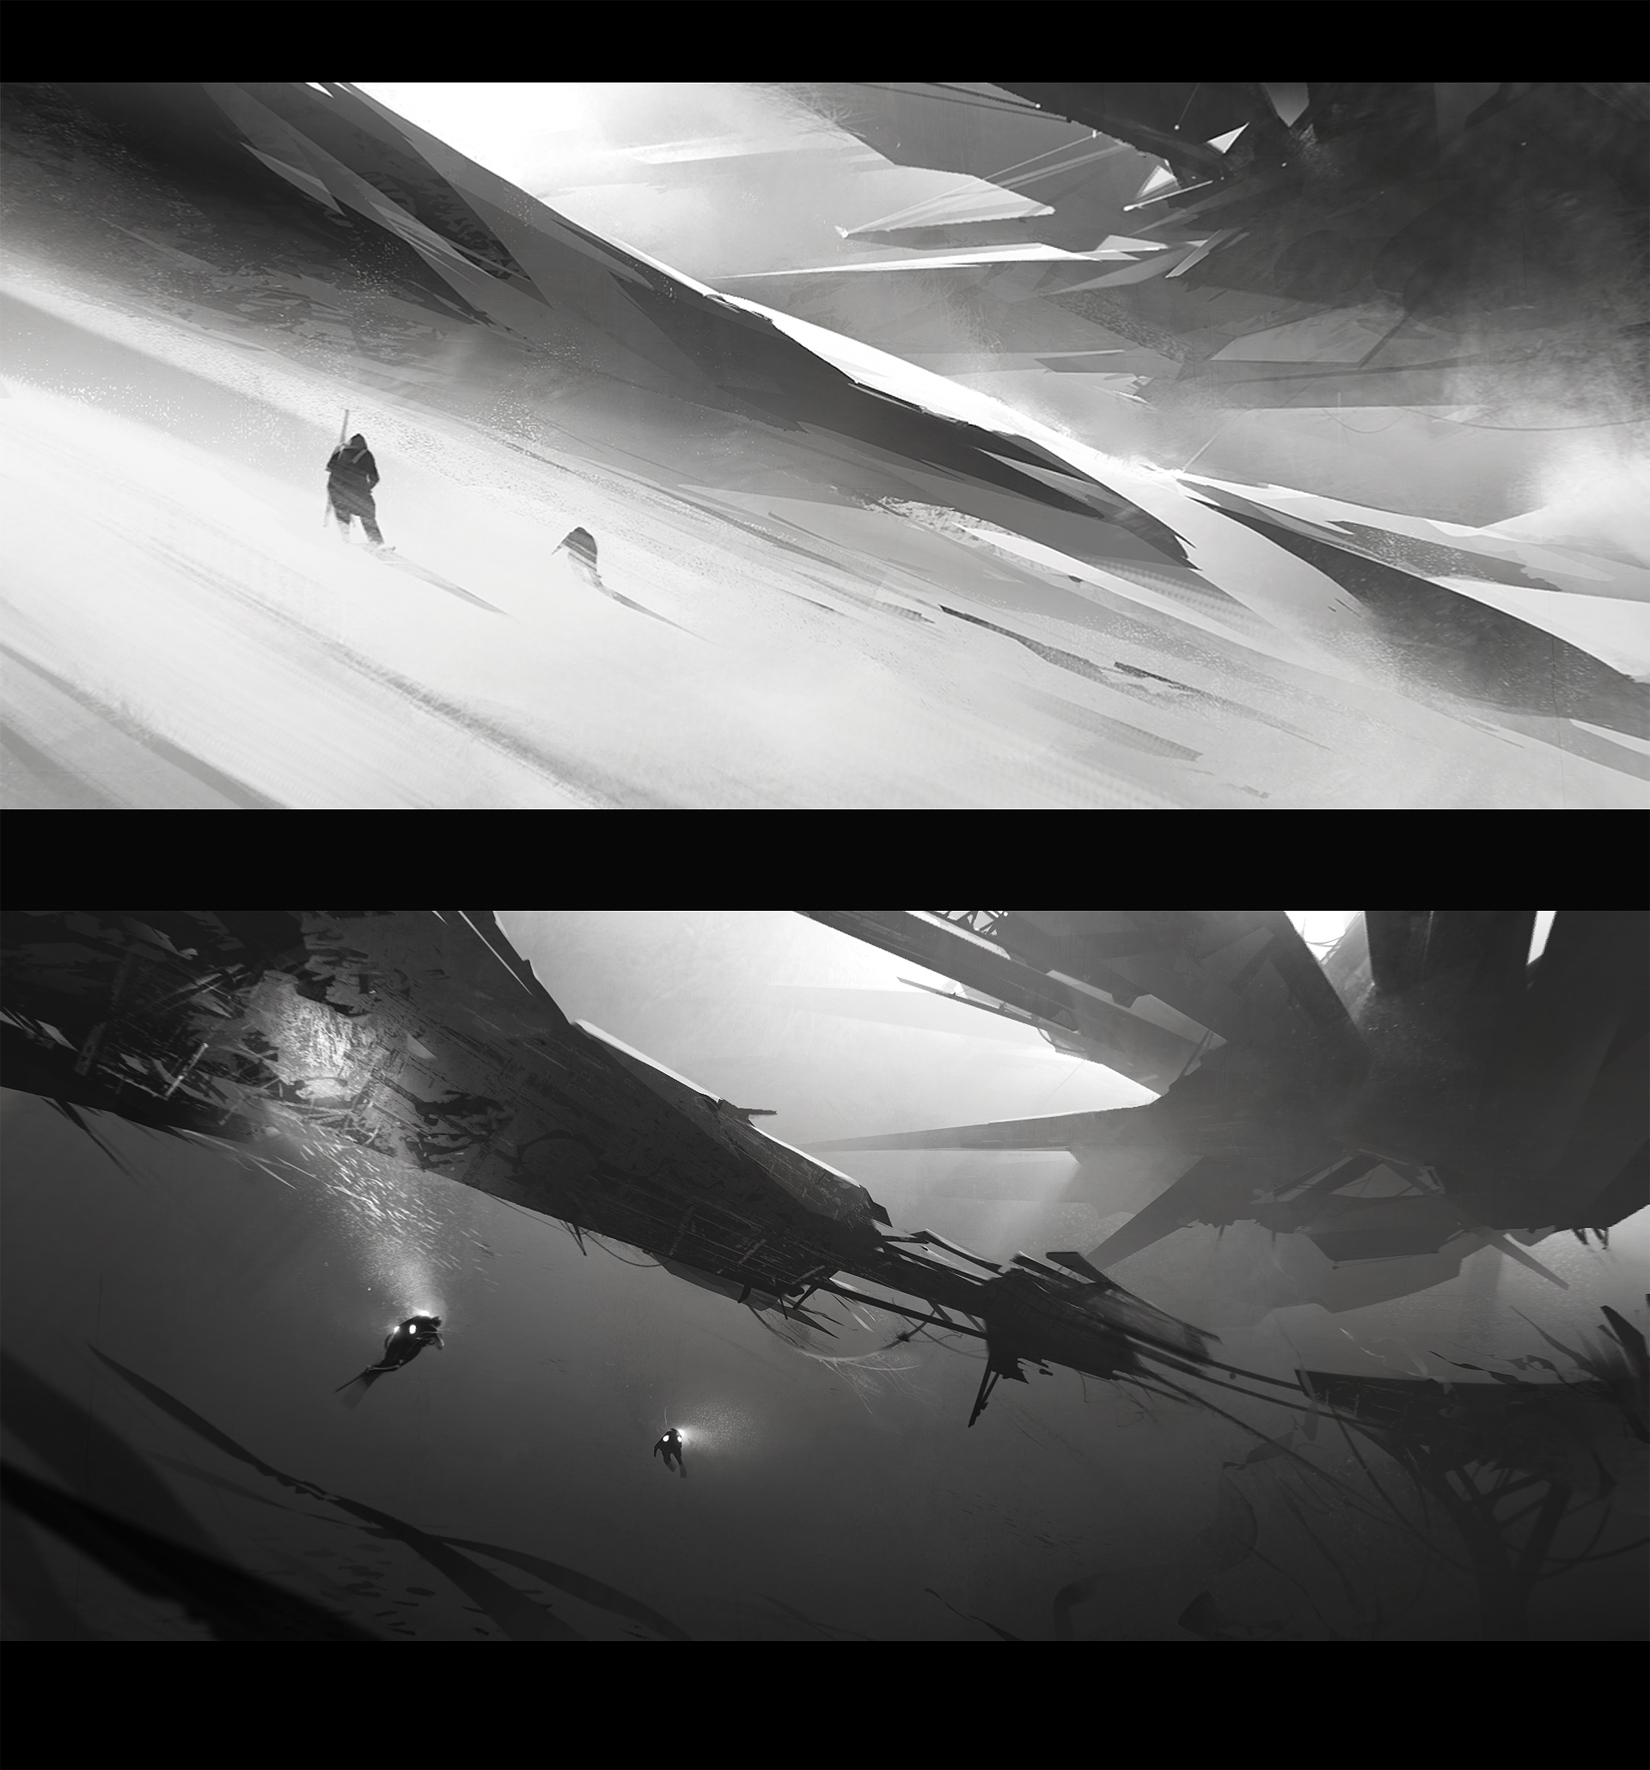
And here are some less breathtaking examples from me.

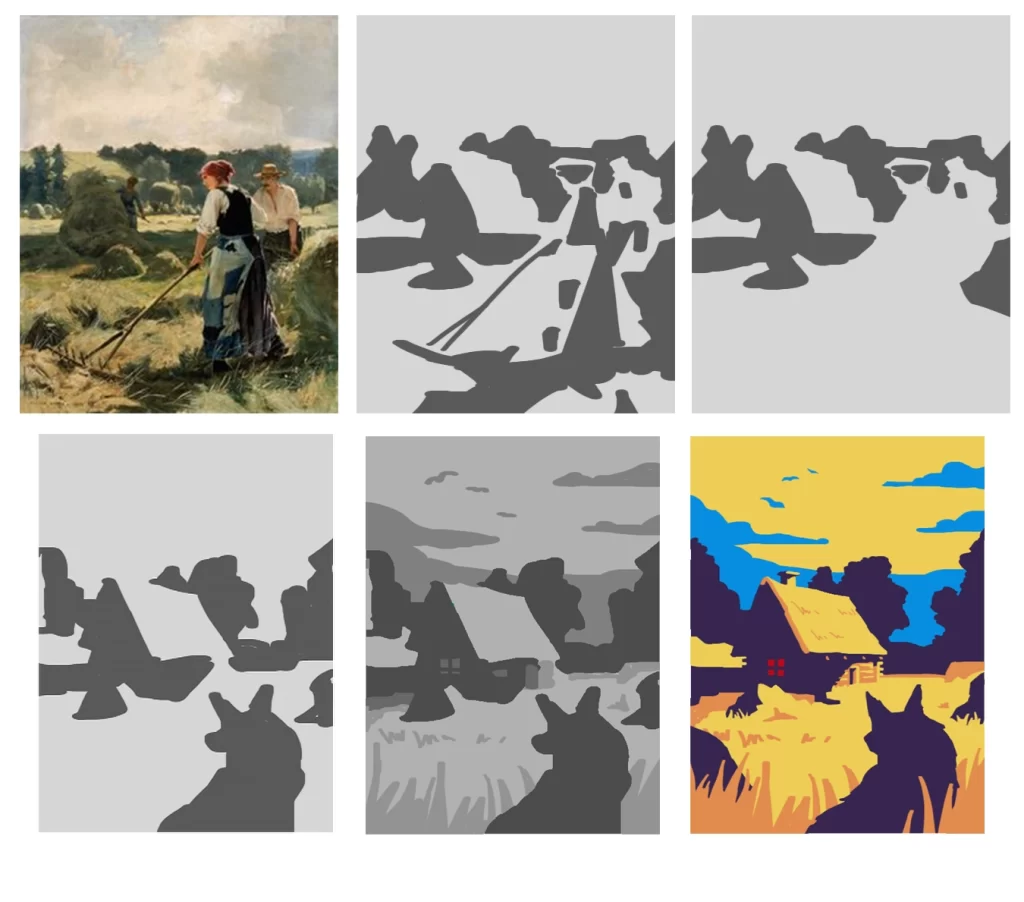
In the example below, you can see that I changed the 2 value structure quite a bit. That’s because I liked the interesting shapes in the background, so I removed the main subject. Then, in the empty space I “saw” this wolf silhouette and added it. After that, I added a few more values, painted colors, and added some detail.
Conclusion
As you can see, using this method we can end up with paintings that are completely different from our starting point, but we used our favorite artists as inspiration and learned something from them.
Do this exercise hundreds of times and you’ll see how your understanding of composition improves with every study you do. And after a while, you’ll be able to come up with your own ideas for paintings and drawings, without even using some other art for inspiration.
If you struggle to find beautiful images with great composition, follow me on Pinterest, where I made a board of lots of amazing art pieces, and I continue to add to them every day.
